In the last post we set up a document database for our application using Azure Cosmos DB. In this post we'll continue setting up our application using Azure Functions for hosting our API endpoints and Azure App Service for hosting our static HTML interface. When we're done with this stage, we'll be ready to start implementing our API and interface in the next part.
Introduction To Azure Functions
Azure Functions is a serverless compute service similar to AWS Lambda and Google Cloud Functions. It lets you write code that can be evaluated and executed on-demand making it ideal for things like API endpoints, web hooks, and scheduled jobs. The resources needed to run the function are scaled as needed and thus you only pay for exactly what you use.
In our case, we're going to use Azure Functions to create an API for our application. This API will be responsible for querying our database and returning the results back to the client as JSON.
You might be wondering, "Why have an API at all? Why not just let the client query the database directly?" It's a valid question, and in some situations that architecture may be exactly what you want. In our case, there's a couple reasons why it makes sense to have an API layer.
The first is for security. By making all database access go through an intermediate layer we can avoid directly exposing our database to the outside world. It'll stay accessible only from our API which can perform additional authentication and authorization as needed.
The other reason to place our data access commands behind an API is so that we can perform additional operations before interacting with the database. For example, we may want to do some complex validation that the database isn't directly capable of. Or perhaps we need to combine two sources of data to create the output the client needs. Regardless, the API gives us an abstraction layer over the database and lets us tailor data operations however we may need to.
Creating an Azure Functions Account
The first thing you need to do to get up and running with Azure Functions is to create an Azure Functions app. This is where your actual functions will live.
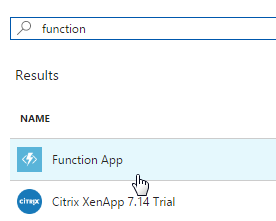
To find the Function App service, search the marketplace:
When you select the service, you'll be presented with a few options:
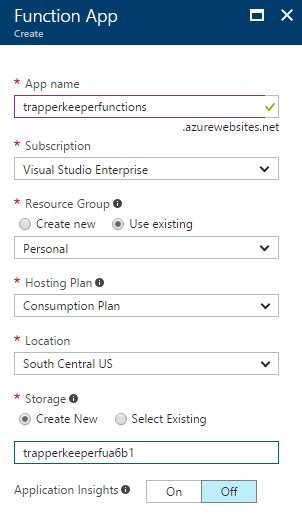
Make sure you select the Consumption Plan so that you only get charged when your functions are actually executed.
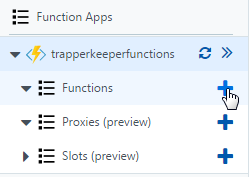
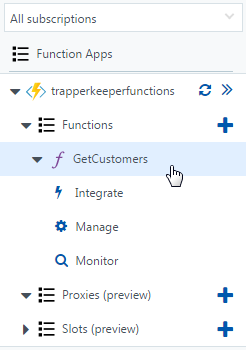
Once your new app is provisioned, you can create your first function. Expand the root node in the left-hand pane and click the blue plus sign next to Functions:
When the wizard appears, click on Custom function:

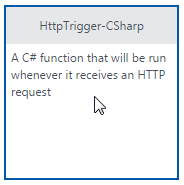
If you use the quick start, it'll create a default function with a generated name, but we want to have full control over our new function. When you select Custom function you'll be presented with a variety of function types across different languages and triggers. For this application, select HttpTrigger-CSharp so that our API will be available on an HTTP endpoint:
You'll be asked to name your new function. The name you give the function will determine what it's endpoint will be. I named the first function GetCustomers. You'll also need to specify how callers will authorize to the endpoint. If you choose Function you'll need to pass a token in the query string to your endpoint in order to activate the function.
Once the function is created, you'll be able to open it in the sidebar:
A default function template is already added for you. We'll get to the actual API code in the next post. To get a feel for how it works, go ahead and run the example code and watch the Log output below the function code:

You can also see what endpoint you should use for your function by clicking the Get function URL link in the upper-right corner.
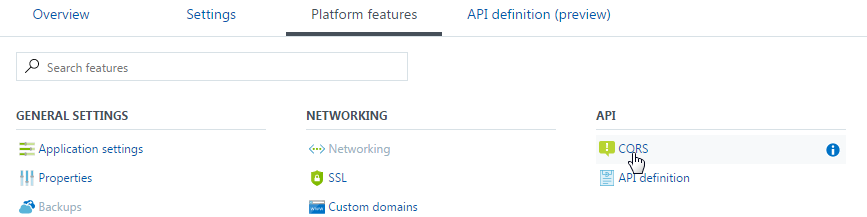
There's one more thing we need to do before moving on. Azure Functions are automatically set up with CORS rules that prevent calling them from any originating URL that's outside Azure. This is a great security feature in production, but we're going to disable it for now so that we don't need to worry about it. If you ever deploy an app that uses Azure Functions, make sure to edit the CORS settings to allow all the domains your app will use.
Click on the top node in the left-hand sidebar for your new functions app and then select Platform features and CORS:
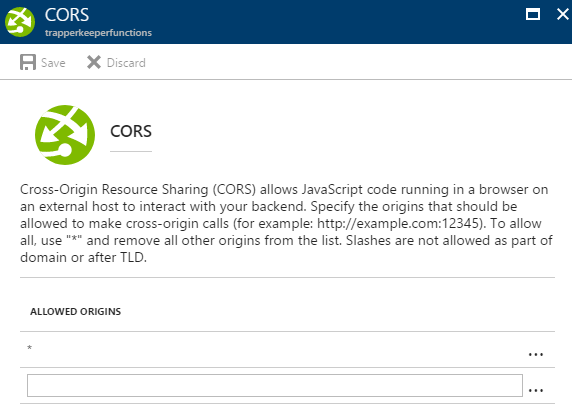
Remove all the predefined origins and just leave a single one with a wildcard:
Creating the Azure Web App
The frontend for our app will have to be hosted somewhere. Since this is mostly a post about Azure, I'll go ahead and host it on an Azure App Service, but since the frontend is going to be all HTML and JavaScript it could really be hosted anywhere that hosts static files. For example, GitHub Pages would be able to host the app just fine.
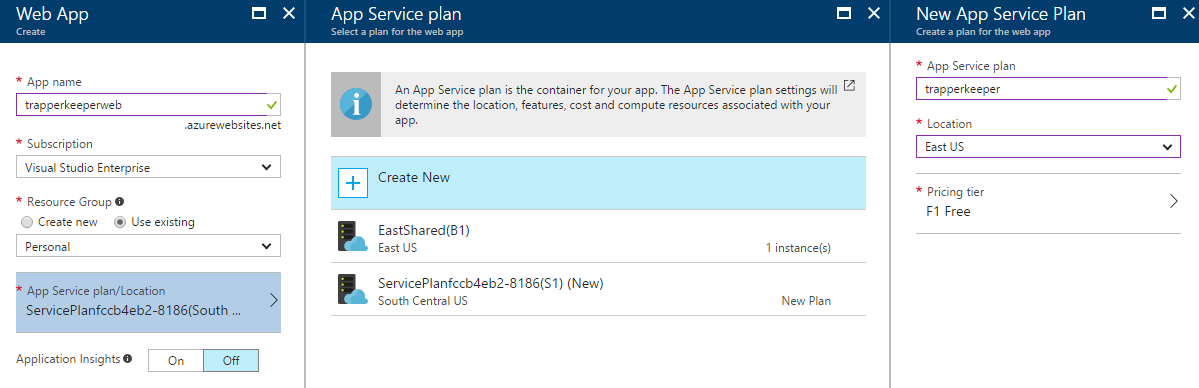
Create a new resource in the Azure Portal and search for "Web App". While creating the Web App, you'll also need to create or choose an App Service plan. I created a new one so that I could place it in the free pricing tier, which should be fine for our purposes.
We'll create the HTML pages for the app in a later post, but for now let's add a default page to our new app. Once it's provisioned, open it in the portal and select Advanced Tools:

Then once the Kudu environment is open, select the CMD debug console:
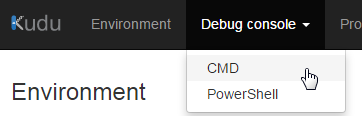
This will open a nice web-based console and file browser that we can use to directly edit our web app.
When you created the Azure Web App, it automatically added an initial file named hostingstart.html. If you attempt to browse to the site you'll see this file by default, even if you add a new index file. So let's delete the initial hostingstart.html file and add our own index.html.
Inside the Kudu console, navigate to /site/wwwroot and click the "+" button and select "New file":
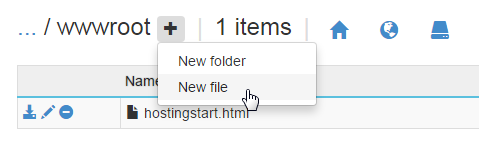
Name the new file index.html. Now delete the existing hostingstart.html file by clicking the minus icon next to it and then edit your new index.html file by clicking the pencil next to it. This will open a web-based file editor where we can directly edit the file.
In the previous post I mentioned we're going to be using Bulma for page styling. More on that later, but for now let's just paste a simple Bulma starter page into our index.html file:
<!doctype html>
<html>
    <head>
        <title>Well Hello There</title>
        <link rel="stylesheet" href="https://maxcdn.bootstrapcdn.com/font-awesome/4.7.0/css/font-awesome.min.css">
        <link rel="stylesheet" href="https://cdnjs.cloudflare.com/ajax/libs/bulma/0.4.2/css/bulma.min.css">
    </head>
    <body>
        <div class="container">
            <p>Hello from the other side.</p>
            <img src="https://media.giphy.com/media/3o6Mbt88G90KJkRaP6/giphy.gif">
        </div>
    </body>
</html>
Now when you browse http://trapperkeeperweb.azurewebsites.net/ (or whatever your web app was named) you'll see your new index page.
Next Steps
Hang on, because it's about to get interesting. In part 1 we set up our database and in this part we set up our API and web app. In the next post we'll shift focus to frontend and the communication between it, the API, and the database.